Tuesday, December 29, 2015

2015 Wrap-up

I had such an amazingly stress-free Christmas season this year and it was wonderful!! Although I didn't follow through on my 12 Months of Christmas challenge as much as I would have liked, what I did accomplish sure made life easier. My cards were made, my menu was planned, and I had several gifts already ready to go. I even had enough time to make projects to sell at a Craft Fair. I think I'm also getting better at not being a perfectionist and to simply let things go if it was too much. For instance, I didn't get any photos in our annual Christmas letter this year. I didn't plan ahead for that, and by the time I did get some nice shots, my printer was out of ink. Since we live 40 minutes from the nearest store to buy ink, and it was already the Sunday before Christmas, it just didn't happen. I could have stressed over it, (and in the past, I would have), but I didn't. Having most of my Christmas to-do list planned ahead was super nice when we found out at the that my mom was coming to stay with us--the next day! All that to say that I plan on doing my 12 months of Christmas challenge again this year. Hopefully, I'll do even better at posting here so you can play along with me.

Speaking of photos, as I was clearing out my phone and camera and organizing the photos, I thought it would be fun to share some of my favorite projects from this last year.

I started the year out with this desk calendar. It was one of the projects for my January TNT class. You can't tell from the photo, but the back side holds a notepad and pen. I did find that by the end of the year, the cardstock was starting to bend a little, so I think the next time I do this project I will reinforce the "tent" with some chipboard.
This little bunny was definitely one of my absolute favorite projects. Aack! So cute!
Who doesn't love a cute bunny butt?!
I am loving the Perpetual Calendar. I gave several of these away as gifts because they are just awesome, and for those of you interested, I am doing a class for this project on January 18. You will only need to have the kit and some adhesive, as I will provide the stamp set and ink. Check out my Events page for details and to RSVP. 
These butterflies were one of the gifts I gave to those attending my New Catalog Open House in the summer.
Paper crafting is not my only hobby. I also love to sew, and while I don't have a lot of time for it, I had to make time for these two projects. I desperately needed a camera strap that would not rub my neck, so I decided to make a pretty one while I was at it. I have since sold several of these to friends and family and am thinking about opening an Etsy shop.
I love to use my clothesline in the summer, but my cheapo clothespin bag fell apart on me this year. I wanted one that stayed open at the top to make it easier to grab the pins, and since I couldn't find a pattern I liked, I made one up. It works great!
And, last-but-not-least, this little cutie. This was one of the projects we did at my Christmas Open House. I'm going to have to use him on a card next year.
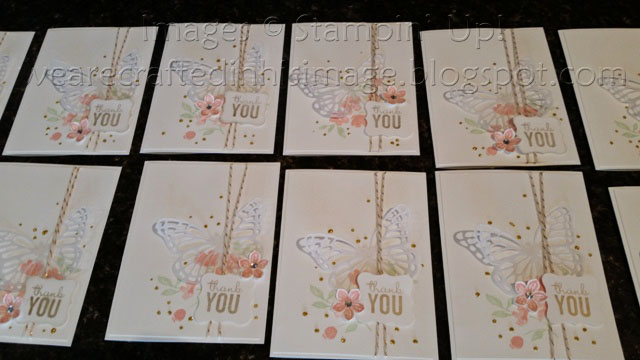
I actually have several other Christmas ideas to share from the Craft Fair that I did, but I think I will share them on another post. I hope you enjoy the last couple of days of 2015 and set some awesome goals for 2016.

Till next time...
God's love and blessings!

Sunday, October 18, 2015

15% Off Stamp Sets!

Wow! Stampin' Up! is having a sale on stamp sets! I've never seen them do this before. Starting tomorrow, October 19, 2015 all stamp sets will be 15% off! This would be a great time to stock up on those sets on your wish list. Unfortunately, the sale only goes through Friday, October 23, 2015.
In addition to the sale, Stampin' Up! is offering an extra 3% in hostess credit to any orders over $300 until November 9th. That gives you 15% instead of 12%.

To make things even sweeter, I'm going to be sending out some special thank you gifts to anyone who places an order with me this month. (Note: when you order, you have to check the box that allows me to contact you. If you don't, legally, I cannot send you the gift or extra goodies.) If you do, please use the hostess code H6NYUAGR. Your order will be mailed to you immediately, but I will keep the order open till the end of the month. If it reaches $150, I will use the hostess credit to get some extra goodies and send them out to all who contributed to that order, along with the special thank you gift. If your own personal order is over $150, do NOT use the hostess code. You get your own hostess credit to use any way you'd like. :o)

I will be back later to share some projects I've been working on, but I just had to drop in here super quick to share this with you.

Till next time...
God's love and blessings!

Monday, August 31, 2015

12 Months of Christmas Catch-Up

I'm back! Did you miss me? I missed you. I missed having time to sit and write on the blog. There just aren't enough hours in a day are there?

I've been enjoying a busy summer with my handsome hubby. He is now a teacher, and this was his first summer vacation since he was in high school. We had a lot of fun! We were pretty busy getting several items checked off our "honey-do" list and we managed to sneak a couple of mini vacations in there as well. If you're interested in hearing more about it you can check out our family blog.

School has now started back up and I am trying to revamp our schedule here at home so that I can get some time at the computer. We'll see how well it goes.

Anyway, back to the 12 Months of Christmas Challenge, how are you doing with it? Me? Ok, I guess. My goals for April-September were to make 10 cards each month and start making gifts. While I didn't get the cards done, or make the gifts, I did come up with several ideas for gifts for loved ones and have gathered supplies for some of them. I will be back later next week with details of some of those gift ideas.

How's your Christmas folder coming along? Mine was at a stand still for several weeks while my computer was acting up, but I'm hoping this next week to finish getting the Menu section finished up by adding one recipe to it each day. I've also been adding links to gift ideas I've found on the web. My friend mentioned that it might be a good idea to go through the address book this month. I know we've had several of our friend's children get married this last year (am I really that old?!?) and I need to get their new addresses and check in with a few of my military friends who are, or have, moved.

So, it looks like I've got some catch-up work to do now so that I'm not super swamped come the end of November. Here's what I plan to do this month:
  1. Make 16 cards.
  2. Finish the Menu section in my Christmas folder.
  3. Organize my Gift section and finish filling out what I'd like to make/buy for friends and family this year.
  4. Make at least 4 gifts (that's 1/week) this month. 
  5. Check address list.
I think that does is for me. My schedule is busy enough, I don't want to add too much to the list. How about you? What are your plans to help make the holidays a little less stressful? 

Since I think blog posts are pretty boring without a little eye candy, here's a card I made back in June. It's the only card I've made lately that I have a photo of. Looks like I need to spend some time with my camera and get some pictures taken. 

I used the Awesomely Artistic stamp set to make this card, and I will say that I had a really hard time with it. I just couldn't figure out what to do with the fern and flower stamps at first. I ended up masking off most of the vanilla cardstock and stamping several of the images. The card on the right I did a bit of a watercolor wash first and then stamped. The one of the left was just stamped. To get the lighter blue color on the flowers, I stamped off once on a scrap piece of paper, then onto the cardstock. I stamped the linen and "friend" images after I removed the mask. The dragonfly was just stamped and then fussy-cut and popped up on dimensionals. Which one do you like better, the watercolored one or the plain? 

I think that does it for me. Time to get ready for bed here. I hope to be back in a day or so with my updated Stampin' Up! class schedule for you and a couple of projects. 

Till next time...
God's love and blessings!


Built for Free Using: My Stampin Blog

Wednesday, June 24, 2015

Hello Again and Open House Take-n-Make Projects

Wow, I guess it's been a while hasn't it? Sorry about that. Lots of fun stuff going on here, and some not-so-fun stuff. A couple of weeks ago we had a last-minute visit from my awesome sis, her hubby and their 4 foster littles. We had a ton of fun the week they were here. We started off their visit with my New Catalog Open House which my sis helped me prep for--she really needs to move closer to me. At the Open House, I told the ladies I would post pics of their Make-n-Take so they would be able to put them together later if they couldn't remember what they looked like. Oops, that was 2 weeks ago, and here I am just now getting them posted. In my defense, I was uber busy with the family that week (MOA, zoo, river boat cruise, hiking, etc.) and finishing up cakes I had already promised to do, and then, about half way through the visit, I started feeling not-so-great. Turns out I had another visitor that week, only this one was tiny and had lots of legs. While I never got to meet the little guy, he left behind some Lyme disease for me to deal with. Not fun. I was out of commission the last day of my sis's visit and most of last week. Thankfully, the antibiotics seem to be doing a good job, and I am feeling back to "normal", whatever that is. :o)

So, without further ado (or excuses), here are the 2 Make-n-Take projects from my Open House:

The first one highlights the new Ronald McDonald House set. I LOVE this set. It is so cute, and so versatile, and the matching punch made this card super easy to do.


The second one is a bookmark highlighting the new In Colors for this year. Love the Petite Petals punch, and, of course, love me some bling! Both of these projects also use our new Triple Banner Punch.


I am in the middle of figuring out a new schedule for my upcoming classes, so I will be back later with that along with a 12 months of Christmas update for you.

Till next time...
God's love and blessings!


Built for Free Using: My Stampin Blog

Saturday, May 30, 2015

Saying Good By is So Hard To Do.


Aack! I can't believe it's already the end of May. I must have blinked or something, cause last time I checked, it was still April!! I am super excited though. Next week is June which means Stampin' Up!'s new catalog goes live. I got a sneak peek guys, and it's AWESOME!! So many beautiful things in there. I will be working the next couple of days to plan my Open House and some upcoming classes featuring the new goodies. Also planning some tutorial videos for here. I taped several videos, but weren't able to get them uploaded, and now the products I used are retiring. Boo. So, that just means I will re-tape, using new stuff. :o)

Speaking of retiring stuff, you better get them while the gettin's good. Only a couple of days before they are GONE! There's always a couple of retiring sets that I am so sad to see go, but then I know they need to make room for new goodies. One of those sets is the Indescribable Gift set from the Occasions Catalog.


Love this set. The flowers are so pretty. Here I pretty much CASE'd the sample on page 34 of the catalog. Why mess with a good thing, right?

Another set, that I'm really going to miss is Painted Petals. This set is SO versatile! It has quite a few different flowers that can be used in lots of different ways.

Here you can see how I used them to make thank you cards for everyone who placed an order with me a couple of months ago. 


And here I just used the sentiments with some pattern paper and punches to make a set of note cards for a fund raiser. Like I said, super versatile set, and I'm very sad to see it going. If you'd like to get your hands on one of these, or any of the other beautiful sets that are retiring, be sure to place your order quick. Also, please use the hostess code above to help support Crafted In His Image, unless your order is over $150--then YOU get the hostess goodies. 

So, on another note, how are you doing on our 12 Months of Christmas Challenge? Me, not so good. I've only got 2 months of my cards made, and I still need to better organize the menu section of my notebook. We were pretty busy in March with the kitchen remodel. April and, especially May, were busy with cakes in that newly remodeled kitchen.  I guess it's a good thing graduations are over and there's still a few months till Christmas. :o) I will be back later with a little update and challenge for you (and me!). 

Till next time...
God's love and blessings!


Built for Free Using: My Stampin Blog

Tuesday, March 17, 2015

12 Months of Christmas March Challenge

Hello there! I made it! I blinked and March almost disappeared without me seeing it. If you remember from my last post, we are busy with a kitchen remodel project, but I did get to spend some time at my desk working with paper and ink and not just wood and paint. Here's one of the cards we made at my last Stamp-A-Stack Class.

This is a single layer card using the Lotus Blossom Stamp Set you can get FREE through the end of March 2015 with any $50 purchase. It's a beautiful stamp set. Here I stamped in Whisper White on Crumb Cake Cardstock and then allowed that to dry before stamping the detail stamps with Calypso Coral. I tied a simple knot around the card using the FREE Calypso Coral ribbon in the Best Year Ever Accessory Pack.
What do you think? I like that it uses just one layer of cardstock, yet is so pretty.

OK, so back to the challenge. My challenge for March is to get my menu fine-tuned and transfer the recipes into my Notebook along with a grocery list. The menu will be pretty easy since we pretty much have the same thing every year, but I do try to incorporate one or two new recipes, especially for cookies and treats to give away. Plus, it will be really nice to have all the recipes in one place rather than digging out multiple different cook books this year.

I think, while I'm at it, I may put together tabs in the Notebook for both Resurrection Day and Thanksgiving menus as well. Why not have everything together?

Since I didn't make my goal for last month, I will continue to look for gift ideas to make and get that part of my Notebook organized. I will also make an additional 10-12 cards.

I guess that's about it:

  1. Organize Menu Tabs
  2. Look for gift ideas
  3. Make 10-12 cards
Since it's already the middle of the month, I think I better set some time aside to work on these! 


Built for Free Using: My Stampin Blog
If you would like to place an order for any of these products or others, please use the Hostess Code located in the upper right corner of the blog. If your order is over $150, do NOT use the code as you will be able to receive your own Hostess rewards. Thank you so much for supporting my business. :o)

Till next time...
God's love and blessings!


Monday, March 2, 2015

12 Months of Christmas February Challenge Update

Hello there! I know...I know. I'm late with my update on February's challenge. But, I'm not super late (only 2 days), and I do have a really good excuse. Really. See:
Handsome Hubby had a week off of work so we decided to tackle one of the major home improvement projects on our list...opening up a window from the kitchen to the living room. Needless to say, I didn't spend much time this last week at my desk. We're probably about 75% done with the project and I hope to post an update on the family blog soon.

Anyway, here I am, and I'm sad to say that I didn't make my goal for this month. That's OK, though. I'm closer than I would have been had I not challenged myself. I did get 12 cards made for the month, and I did do a bit of perusing Pinterest for gift ideas, I just didn't see much that sparked my interest there. That may or may not have been due to the fact that most of my perusing involved paint colors rather than gift ideas. ;o)

So, here are the cards I made for February:


I used our Wondrous Wreath stamp set, and after adhering the white cardstock to the card front, I used the center die to cut a "window" out. This allows you to see the "Joy" stamped on the inside of the card. I think it might be cute with a family photo peaking out as well. What do you think?

Here's a list of supplies I used to make these cards. LOVE the glimmer paper bows. :o)
Built for Free Using: My Stampin Blog

I will be back with the challenge for March along with a card we did at my Stamp-A-Stack last week.

till next time...
God's love and blessings!

I hope you are enjoying my projects. Please use the hostess code when you place an order. (The current code will be in the upper right corner). However, if your order is over $150, please do NOT use the code, as you become the Hostess and receive the rewards! 

Tuesday, February 17, 2015

Technique Tuesday-Thank You box

Hello there! I'm here to share a little gift box with you. It's the perfect size to fit a chocolate bar, which is a perfect gift, don't you think? The confetti punch makes fun a peek-a-boo effect for the accent color to peak through.

I explain in the video that I have a been hoarding a collection of paper boxes I bought many years ago in Japan. I decided it was time to make templates out of them so I could actually use the boxes. This is the first one I chose to do. I love how it opens and the fact that it doesn't use any adhesive to hold it closed. Pretty cool.

I hope you enjoy it.

Here's the dimensions for the box:
Paper 8 1/2 x 7
Score on 7" side @ 2, 2 1/4, 4 3/4, 5
Score on 8 1/2" side @ 1 1/4 and 7 1/4
2 side flaps have an additional score of 1/4 inch.

Product List

Tuesday, February 3, 2015

Technique Tuesday-Valentine Box

Hello there! I'm here with a quick tutorial for a Valentine's box made from our Curvy Keepsakes Thinlit. This was one of the items that carried over from the holiday Occasions Catalog and I'm so glad it did. The box itself is super easy to put together, but I thought it needed a window to show off the cute candy inside.

Start by cutting the box piece in two different colors to help add some contrast.
Fold the bottom of the white piece up like this and slide both layers into your Sweetheart punch.
Center in the punch side to side and make sure the bottom of the handle is right at the edge of your punch.
Now you have a heart on the side and a surprise heart on the inside of the box. I didn't think about it before, but it would be super cute to stamp something sweet on the inside heart.  Cut a piece of window sheet to fit over the outside heart and glue down with Fast Fuse. I find it helps to close the box if you run the pieces over the edge of the table to help them curve a bit before folding it up.
That's it. Glue the two bottom pieces together, fold up, fill with goodies and add accents. I used one of the punched hearts and added some Itty Bitty Accents hearts punched from Red Glimmer Paper . The sentiment came from the January Paper Pumpkin kit, but the Groovy Love stamp set has several sentiments that fit on this heart as well. I tied the heart on with Cherry Cobbler Bakers Twine.

What do you think? Quick, easy and cute. Love it! 

Till next time...
God's love and blessings!

Monday, February 2, 2015

12 Months of Christmas February Challenge

It's February. Yep, January is gone and it's time for the next month of the year. Funny how that works isn't it? For those who are new to this series, I'm posting challenges each month to help make life a little easier come Christmas time. Last month we put together a notebook to help in keeping track of all those great ideas and made 10 cards.

This month's challenge is to focus on ideas for home-made gifts. Pinterest is a great place to start, but I also have a HUGE collection of craft books that are collecting dust on my shelves. I think I may dig out one or two and peruse them for some ideas. A couple of things I'm going to keep track of are not only the ideas, but any recipes and supplies needed. This way I can keep an eye out for needed items when they may be on sale.

I will also be making 10 cards again this month. I'll probably end up making 12, just because it's easy to make them in groups of 4, plus, I can use extras for gifts, or possibly sell them at one of the many holiday craft bazaars they have around here. I've always wanted to do something like that, just never planned far enough in advance. Maybe this year, my daughter-in-love and I can do some of the sales together. That would be so much fun!

That's really it for this month's challenge. I hope to gather at least 1 idea per person on my gift list, hopefully more.

Well, I can't leave you without a project of some kind, so I will share this little cutie I made last week.


Isn't he adorable?!? I used this tutorial for the bunny with just a little tweaking.  Of course, he's trying to get inside our new Berry Basket for some treats.


A friend mentioned that he needed some carrots, so I used our Tree Punch for the main shape, cutting off the trunk and used the Corner Rounder to round out the tops of the carrots. The branch from the Builder Bird Punch made the perfect greenery and while I was playing with the Bouquet Bigz Die my daughter said the frilly flower die would make the perfect grass for the bunny. Great idea!


Aack! Bunny booties are just too cute! Can't stand it! I think I'm going to have to play around with this idea and see if I can come up with some Christmas type characters to hang out on the berry basket.

I better get going. My order came in and I still have a lot of new stuff to play with. ;o) Feel free to leave a message and let me know if you're playing along and how you did on last month's challenge.

till next time...
God's love and blessings!

Saturday, January 31, 2015

12 Months of Christmas January Update

Hello there! It's the last day of January 2015. I told you I would be back with an update on how I met the January challenge to get ready for Christmas 2015, and here I am. The challenge for January was to Start putting together a notebook, whether it be paper or digital, put together a list of gift recipients, and make 10 cards. 

Let's start with the notebook. As I mentioned in the challenge post, I am using OneNote to organize all my thoughts and ideas for Christmas. It's still in the process, but this is what I have so far:

  1. Gift Recipient List
    1. Family
    2. Friends
  2. Emma Ideas (This is our "elf" that helps out around Christmas)
  3. Gifts
    1. Ornaments (I make ornaments for my niece and nephews every year)
    2. Ideas
    3. Inventory
    4. Recipes
    5. Supplies
  4. Menu
    1. Recipes
    2. Ingredients
I filled out what I could for Gift Recipient List and I started adding recipes to the Menu tab. These are things that pretty much stay the same every year, but I hope to add in at least one or two new recipes each year. 

I am really liking the idea of having a notebook like this. I can continue to add to it, and if I'm good at keeping notes, I can see what I sent to who and not repeat myself. I wish I'd thought of this years ago. It would be nice to have a record of the handmade items I've sent people over the years, especially the ornaments. One of the things I like about using OneNote is that I can drag and drop things directly to the pages and it adds links to websites for me automatically. I can also use Pinterest to help me remember ideas, but some of my gift recipients see my Pinterest boards and I don't want to give things away. ;o) Of course, I could probably make a private board that no one can see but me. 

I also made my 10 cards. Actually, I made 12 just because it's usually easier to make cards in groups of 4. Wanna see? 

I even stamped a sentiment on the inside. :o)
That's it for now. I will be back later with the challenge for February, but right now I'm going to go finish up a cake for church fellowship tomorrow, and then play with my new Occasions Catalog and Sale-a-Bration stuff that came in. Yay! Play time!!

till next time...
God's love and blessings!

Tuesday, January 20, 2015

The Best Things In Life...

Hello there. I'm super busy this week, but I wanted to make a quick post to share this super sweet frame we made at our Team Meeting last weekend.


Isn't it super cute? I love the new Bow Builder Punch, and the Chalkboard Paper, and of course, I love me some sparkly! :o) This Stacked With Love Paper Stack has some really awesome prints in it. We only used some of the black and white prints for this project, but the other side has cute pops of red and pink in them. Hmm, looks like I may need to do a class for this. What do you think?

Here's one of the other projects we got to make.
Yep, gonna have to get the Berry Basket Die too. Just gotta. I can see so many cute gift projects to make with this, and so many fun ways to decorate it. I mean, there's Valentine's Day coming up, and Resurrection Sunday, of course, birthday gifts and Mother's Day. Lots of possibilities with this one.

Well, I need to finish getting ready for a class tonight so I will close here. Hope you have a fun day and get some time to be crafty this week.

till next time...
God's love and blessings!

Tuesday, January 13, 2015

Technique Tuesday-2, 4, 6, 8 Bag

Hello there! I'm here to share a quick tutorial with you. This is one of the first 3D items I learned as a new demonstrator many years ago. With Valentine's day coming up next month, I thought you might like a quick project to hold some little chocolates in. I made this one to give as a birthday gift.

You need to start with a half sheet of paper (8 1/2 x 5 1/2) and score it at the 2", 4", 6", and 8" marks across the 8 1/2" side. Can you guess why it's called a 2, 4, 6, 8 Bag? Now turn it sideways and score again on the 2" mark. Cut along the scores as you see below.
You could decorate this in LOTS of different ways. I chose to do a simple watercolor technique directly on the bag, so I did that before assembling the bag. I used our Stampin' Write Markers to ink up one of the flower stamps from our hostess Bloom With Hope set.
Then I held the stamp away from my project and spritzed it with water.
I stamped directly on the square that would be the front of my box. I didn't want the flower to be too high on the box, so some of the stem extends across the bottom. (The flaps weren't trimmed on this paper yet.) See how the water makes the color bleed a little, giving you a watercolor look? I did do a couple of test stamps on some scrap paper to see how far away to hold the spritzer so I wasn't getting too much or too little water. 
Use a little Sticky Strip across the tab on the side and the backside of the flap below the flowers. 
Assemble.
This has the bottom side up. 
If you push in the sides on the top, you can squeeze it together. 
This is hard to take pictures of with one hand.
To hold the top together, I punched two holes in the top, through all the layers, threaded a piece of Seam Binding Ribbon through and tied a bow. I like this box because it uses a half sheet of paper with very little waste, it comes together quickly, and it is the right size to hold several pieces of chocolate. You can't go wrong with chocolate. :o) 
till next time...
God's love and blessings!

Friday, January 9, 2015

Blendabilities Chalkboard Effect

Hello there! I said I would be back with a sneak peak of a project for this month's Tips, Tools and Technique class and here I am. What do you think?


I made this card by embossing the images in white and then coloring them in with our Blendabilities Markers.  I love how the colors just pop off the background, and it was super easy and quick. :o)

Here's a quick storage tip for you. My friend Georgia posted this great tip a while back, and I'm just now getting around to implementing it. I was already using our Wood Mount Stamp Cases to store my Blendabilities, but this tip helps to hold them on either side. Bonus, it uses up something I would normally have thrown away--broken hair ties. I suppose you could use new ones and cut them, or just some elastic, but since we always seem to have broken hair ties around, that's the route I took.

Use the Paper Piercing Tool to poke a hole about half way down on all 4 of the longer sides. 
My daughter and I have very thick hair, so the hair ties we have are pretty thick and I needed my holes to be quite large, so I poked a pair of tweezers I had in the holes and wriggled it back and forth. If your ties are smaller, you could probably get away with just wriggling the Paper Piercer around. 
Then thread a broken hair tie through the hole. This may take a bit of wriggling. If my ties had been thinner, I would have used a floss threader to pull it through. Instead, I just wriggled and poked till it went through. (This project really would have been easier with smaller hair ties)
Tie a knot in the hair tie on the outside of your box. Stretch it across the inside to the opposite hole, poke it in, pull it tight and tie another knot.
You can store your markers in one of two ways; either in the original box, or out. You can see here that if you take them out of the box, you can fit 3 sets on one side. I think I'm going to go with that method. It will also make it easier to see what colors are in which box.
Keep in mind you do not want to store these in a typical upright position. Markers are best stored on their side. 

I guess that's about it for today. Hope you have a super crafty day and I will be back next week with some more fun projects. Oh, and if you'd like to see another project for this month's Tips, Tools and Techniques class, check out my Facebook page. 

Till next time...
God's love and blessings!!

Tuesday, January 6, 2015

Technique Tuesday-Dry Erase Shaker Board

Hello there! I am trying to get back into the blogging groove (not that I was ever really in it very well before). The new year always finds me revamping the schedule and trying to figure out a way to do it all. It does get better each year as I realize what the "all" is that I really want to do and cutting out things I don't need to do. I would like to be better at posting fun tutorials on here. Sharing what I do is my favorite part of crafting. 

With that in mind, I put together this quick little tutorial for you. I enjoy making little dry-erase memo boards to give as gifts. They are a quick and inexpensive gift that you can personalize to teh recipient. All you need is some paper and a picture frame. I look for frames every time we stop by the thrift store. This time I decided to do something a bit different. The Paper Pumpkin kit for December makes some cute shaker cards for several different occasions so I used the kit to make my first dry-erase shaker memo board. The confetti adds a fun bit of whimsy to it.
Let's get started. For this project I used the December Paper Pumpkin kit and one of the thrift store frames in my stash.
I did use a sheet of Smoky Slate cardstock for the background instead of the Basic Gray that comes in the kit. I didn't want the background to be so dark you couldn't read the writing on the board. I started by putting the cardstock (cut to fit) in the frame and marking the corners. That way I knew where to put the decorations and where to make my inner frame.
The Paper Pumpkin kit always comes with most of the paper pieces shrink wrapped to a pretty sturdy piece of chipboard. I used this to make an inner frame to hold the background piece away from the glass and make room for the confetti. My cutter wouldn't cut all the way through, but I just made one cut, turned it over and cut in the same place on the other side. Worked perfect.
The small "hello" stamp from the set to made a background behind the photo frame. I wish I had already glued the inner frame on though as it might have helped me to center the photo frame better. Oops. :o( The blue "hello" is a sticker--so nice not to have to glue all those tiny edges down. I used a marker to ink up the word "friend" and stamped it below the "hello".
I used our Tombow multi adhesive to glue the inner frame on, but I could have used Fast Fuse just as well. The kit comes with several sheets of stars to punch out and some sequins to use for confetti. I just placed these in the middle.
I decided to use Fast Fuse to adhere the glass to the front before I slid it into the frame. I didn't want all my shaker pieces to fall out the bottom every time I moved the memo board.
This frame didn't come with a stand, but I wanted the option to be able to sit on a desk, so I cut more of the backing board to make one. More Tombow worked to adhere the top of it to the back.
There you have it. I simple little board to write notes on. I think I'm going to send this to a friend who is far away and every time she sees it she will know I am thinking of her. I might have to make a couple of these.
Hope you enjoyed my little tutorial. I plan to be back later this week with a sneak peak of a project for this month's Tips, Tools and Technique class.

Till next time...
God's love and blessings!