Sunday, April 9, 2017

Spring Basket Video

Hello there and Happy Spring! 


I hope you have some nice weather to enjoy right now. I live in Wisconsin. Wisconsin doesn't know how to handle spring. It was 70 yesterday. We're in the middle of a thunderstorm right now. We're supposed to get a couple inches of snow tomorrow. No kidding. I kind of like it though. Keeps me on my toes and I love seeing the brightness of the new greens against the browns of winter, and those purples look super pretty wrapped in a blanket of white. 

I designed this Get Well basket a little while ago and decided I wanted to make a spring version and show you how to make it. It only uses one sheet of cardstock, a few scraps, and an optional sheet of copy paper for your "grass" in the basket. This is really a good sized basket as you can see by the goodies inside, and it is pretty sturdy. In fact, after I took these photos, my daughter confiscated the brown one, changed up the tag, and filled it with nail goodies for her friend's birthday. :o)


Please let me know what you think of the project, and I would love to see one that you've made. 


I've included a link below to the items I used. If you're interested in some free goodies, please use the Hostess Code you see above when placing an order. At the end of the month the Hostess credits will be divided up among all the orders and I will send out a surprise goodie to you along with your thank-you card and gift. 


Till next time...
God's love and blessings!!

Thursday, April 6, 2017

Crazy About Watercolor

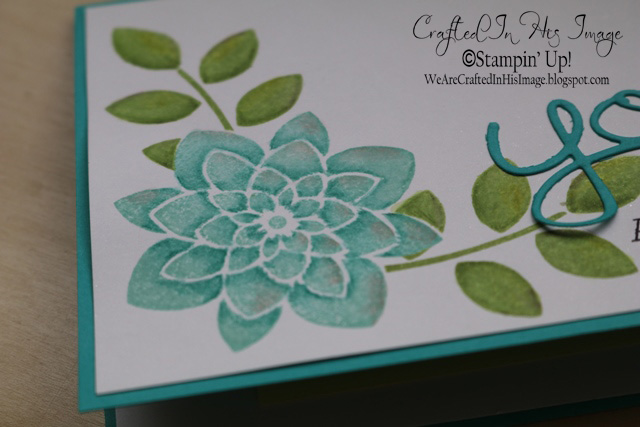
Hello there, here's a simple card to give to someone special. I used the Crazy About You Stamp Set, but changed it up a bit with our Watercolor Pencils. 


After stamping the image with Pool Party and Pear Pizzazz, I went over the petals and leaves with varying shades of the pencils and then brushed over them with water from an Aqua Painter. Because our inks are waterbased like the pencils, it all blended together. I used the Bermuda Bay at the base of each petal and added a touch of Calypso Coral to the tips. I used Old Olive and Daffodil Delight on the leaves. I like the dimension it gives to this simple stamp set.


Hope you enjoy this card and get a chance to do some crafting this week. I'm going to be busy making swaps for OnStage Local this Saturday. It's my first time at one of these and I'm SUPER excited!!

I've included a link below to the items I used. If you're interested in some free goodies, please use the Hostess Code you see above when placing an order. At the end of the month the Hostess credits will be divided up among all the orders and I will send out a surprise goodie to you along with your thank-you card and gift. 


Till next time...
God's love and blessings!!

Monday, April 3, 2017

Easy Rose Wonder Card

Hello there and happy spring!! I love the Rose Wonder Stamp Set and the Rose Garden Thinlits. They are gorgeous, but, for me, they can be time consuming. I generally like to emboss the rose and then watercolor it in, or even do the Stanied-Glass technique of gluing in all the pieces from the rose die. For this card though, I was looking for something a little quicker. I had a rose cut out from another project and thought I would try and use it as a stencil. And, voila! A beautiful rose in no time at all.


I simply held the rose down and sponged color over it, rubbing gently. I used Rose Red for the rose (how appropriate :-) ) and added a bit of Real Red to the center to give it some depth. And, as you can see in the photo above, I now have a colored die cut to use on another project. Double win! 


Here's a list of supplies I used for this card. Don't forget to use the Hostess Code you see above when you place an order so I can send you some freebies.


Till next time...
God's love and blessings!