Thursday, January 28, 2021

Cocoa & Crafts 3 Project #4

Here we are with the last project for this month's Cocoa & Crafts class. I hope you enjoyed the different things we made. I'm looking forward to next month's class featuring the Always in My Heart bundle. 


This card uses an unusual crafting tool--Post-it notes, or in this case, some Post-it notepaper. I always love the moment you pull back the paper and reveal that smooth, crisp edge. Yeah, I'm kind of weird like that. :o) While we did use the sponge for this particular kit, you could totally do this technique with the new blending brushes. Those just weren't available to us when I put together these projects and ordered everything. (We do get to use the new brushes in next month's kit though.) 


Here's the measurements for the card: 

The base (Pear Pizzazz) is 5 1/2 x 4 1/4

The white card is 5 3/8 x 8 1/4 scored at 4 1/8

If you don't have a kit, and would like to make this card, here's a list of supplies you would need:


Till next time...
God's love and blessings!

Monday, January 25, 2021

Cocoa & Crafts 3 Project #3


Hello there and welcome to the last week of January 2021. Can you believe it? We will have two classes this week to finish up the projects before February hits, so I will be back on Thursday with our last project. 

Today's card was inspired by a card I saw on Patty Chenail's blog a little while ago. I thought it was a great way to use these stamps, and y'all probably already know I am loving the z-fold cards lately. 

This one goes together pretty quick, and I think it is amazing how many different shades of color we are able to get out of just two ink pads. 


The measurements are pretty simple. You need a basic card base (5 1/2 x 8 1/2) and score it at 2 1/8 and 4 1/4. The DSP panel is 5 3/8 x 2. 

Here's the supplies you would need to make this project if you don't have a class kit:


I will be back Thursday with our last project for this month's class. See you then!

till next time...
God's love and blessings!

Wednesday, January 20, 2021

Cocoa & Crafts 3 Project #2


Hello, hello! How is your January going so far? I pray it is well. I'm actually quite proud of myself for sticking to a schedule and getting some things done even when it's kind of lazy, snuggle on the couch kind of weather around here. Last night I finished 16 birthday cards! It took  several days of coloring a little here and there, but I finished them! Yay!! I'll share the finished cards with you later this week or next. 

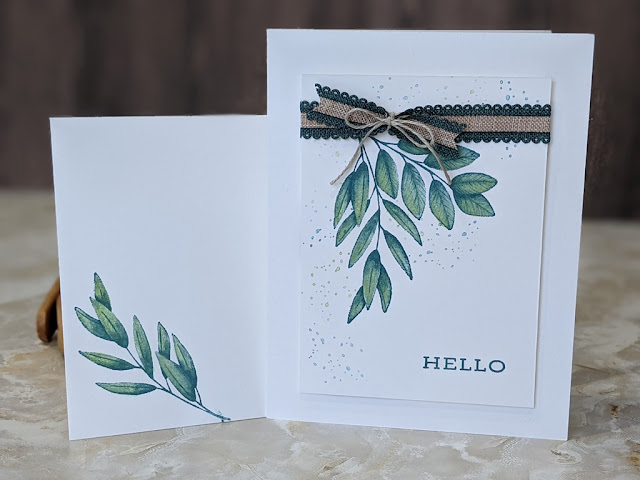
Anyway, today we are putting together a pretty quick card. It does use one item that was not included in your kit, but it is totally optional. If you don't have an Aqua Painter, or a simple paint brush, you could totally skip that step. It just adds a bit of depth to the leaves. 

There's only two pieces of cardstock on this card:

5 1/2 x 8 1/2 card base

4 1/2 x 3 1/4 panel on the front. 

I hope you enjoy the video and have an easier time tying your bow than I did mine. 😊 


If you don't have the Cocoa & Crafts kit, and would like to make this project, here's a list of supplies needed:


Till next time...
God's love and blessings!

Monday, January 18, 2021

Cocoa & Crafts 3 Project #1

Hello there! Today we are going to create a cute little tag with a hidden chocolate surprise. From the front it just looks like a gift tag you could tie onto a gift, but when you slide the sleeve down, it reveals 3 sweet little Andes Candies. It's a very quick project to put together and one that could easily be popped in the mail to send off to someone. 


Let's see how we put this together:


Here's what you would need to make this project if you don't have a kit:


I do hope you enjoyed the project today. I am so looking forward to when we can craft together again.

Until then...
God's love and blessings!

Wednesday, January 13, 2021

Cocoa & Crafts 3 Bonus Project

Today we have a bonus project for our Cocoa & Crafts class. I had already designed the 4 projects for the class when I realized it was the beginning of a new year and we needed a desk calendar to help keep us on track. 


This calendar is made simply by adding a support piece to a simple card base. In the video I show you how to take a free printable calendar and turn it into a tear-off calendar. It's a pretty quick technique and you can use it to make yourself some notepads as well. One thing I forget to mention in the video is to make sure you get adhesive at the very top of the back of the calendar before gluing it down, otherwise your pages will begin to droop down as the year goes on and nobody wants a droopy calendar. Here you can see where I didn't get it high enough and will need to squeeze a little glue in there to fix it. 


Here's this week's video. Please comment and let me know what you think. Thanks!


For this project you will need:

  • Base piece: 5 1/2 x 11 scored at 4 1/4
  • Support piece: 5 1/2 x 3 scored on short side at 1/2, 1 1/2, 2 1/2
  • White panel: 5 1/4 x 4
  • Pink square uses the largest two squares in the Layering Squares Framelits and the Peacock square uses the largest as well, but you may have to adjust this to fit the size of your calendar. 
Products used in this project:


I hope you enjoyed this little project. 

Till next time...
God's love and blessings!

Tuesday, January 12, 2021

You've Got Mail Snailed It Card

I was supposed to be posting the first of this month's Cocoa & Crafts class today, but there have been some delays in shipping and getting supplies, so that has been postponed a little to make sure everyone has their kit in time for the class. Meanwhile, I thought I'd share this fun little card I made just because I absolutely had to play with the new Snailed It set. Just had to. It's so stinkin' adorable!! 


As you can see I'm really enjoying the z-fold technique lately. It can make for a fun surprise when the card is opened, like the cute little snail inside this one. I thought about using Blends to color this, but I opted for an Aqua Painter and ink from the pads. I do love the Mint Macaron and Soft Suede together. 

How fun is this card? I may find myself making a few more just so I have an adorable card on hand to send to someone who needs a pick-me-up. 

If you'd like to make this card yourself, here is a list of supplies I used to make this card: 


If you would like to order any of the products, simply click on the image and it will take you directly to my store. Remember, if your order is less than $150, use the Hostess Code you see above. This way I can order extra goodies to send you along with your Thank You gift. 

Till next time...
God's love and blessings!