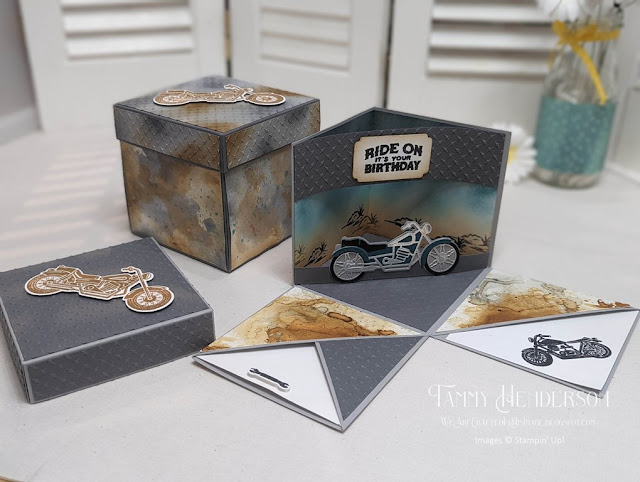
Hello there! I have a super fun 3D project today. This little box is actually a fancy way to give a gift card to someone. Once you take the lid off, the sides fall down to show a little diorama scene. One flap holds a gift card while the other gives you a place to write a little note to the recipient.
I make quite a few holiday themed boxes like this to sell at craft shows each year, but I believe this is the first birthday themed one I've done. I'm going to have to play around with some feminine birthday and anniversary themed ones next.
Measurements:
- Box lid 8 1/8 x 8 1/8 scored at 1, 2, 6 1/8 and 7 1/8 on both sides. See pattern below and video to trim.
- Top panel 4 x 4
- Sides 7/8 x 4
- Box base 12 x 12 scored at 4, 8 on both sides. See pattern below and video to trim.
- Outside panels 3 7/8 x 3 7/8
- Inside large triangles 3 3/4 square cut in half
- Inside small rectangle 2 5/8 square cut in half
- Bottom square panel 3 7/8 x 3 7/8
- Title banner 1 1/2 x 6
- Motorcycle strip 1/2 x 6 1/2 scored at 1/2 and 6
- Both pocket inserts are 3 7/8 wide. See video on how to measure depth.
- Back panel 3 7/8 x 7 3/4 scored at 3 7/8
 |
| See my E is for Embossing post to see how I made the pattern paper. |
What do you think? Isn't this a nice way to give a gift card to someone? As I mentioned above, this is pretty easy to adapt to other occasions by simply changing out the pattern paper and stamp sets.
I hope you have enjoyed today's post. If you decide to place an order through my website, if your order is less than $150, please use the Host Code listed above (on the right), so I can send you an extra free goody. If your order is over $150 don't use the code as you get to pick out the goody yourself when you place your order.
Till next time...
God's love and blessings!


